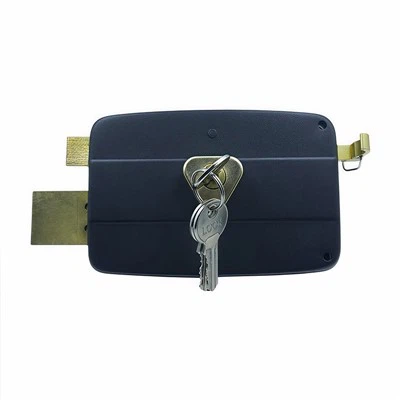
Installing a mortise garden shed lock is a crucial step in securing your shed and protecting its contents. As a trusted garden shed lock supplier, we understand the importance of a proper installation process. In this blog, we will guide you through the entire process, ensuring that you can complete the installation with ease and confidence.
Tools and Materials You'll Need
Before you start the installation, gather the following tools and materials:
- Mortise garden shed lock set
- Screwdriver (both flathead and Phillips-head)
- Drill with appropriate drill bits
- Measuring tape
- Pencil
- Chisel
- Hammer
- Wood glue (optional)
Step 1: Prepare the Door
The first step is to prepare the door for the lock installation. Measure the location where you want to fit the lock. Usually, the ideal height for a garden shed lock is around waist level, approximately 36 to 42 inches from the bottom of the door. Mark the centerline of the door horizontally and vertically using a pencil and a measuring tape. This will help you align the lock correctly.


Step 2: Mark the Mortise Cutout
A mortise is a recess in the door where the lock mechanism will fit. Place the lock body on the edge of the door at the marked centerline, and trace around it with a pencil. This outline represents the area where you will make the mortise. Make sure the tracing is clear and accurate.
Step 3: Cut the Mortise
Using a chisel and a hammer, carefully cut the mortise according to the traced outline. Start by making a series of cuts along the outline with the chisel, then gradually remove the wood inside the marked area. Work slowly and steadily to ensure a clean and precise cut. You may need to make multiple passes with the chisel to achieve the correct depth. The depth of the mortise should match the thickness of the lock body. If you are not confident in your chisel skills, you can also use a router to create the mortise.
Step 4: Drill Holes for Screws
Once the mortise is cut, it's time to drill holes for the screws that will secure the lock. Refer to the lock's installation instructions to determine the correct drill bit size. Place the lock body in the mortise and align it properly. Use a drill to make holes through the screw holes in the lock body and into the door. Make sure the holes are straight and the same depth as the screws.
Step 5: Install the Lock Body
Apply a small amount of wood glue to the edges of the mortise if desired. This can help provide additional stability and prevent the lock from rattling. Carefully place the lock body into the mortise, aligning it with the drilled holes. Insert the screws through the holes in the lock body and into the door, and tighten them using a screwdriver. Be careful not to overtighten the screws, as this can damage the lock or the door.
Step 6: Install the Strike Plate
The strike plate is the part of the lock that is installed on the door frame. It aligns with the bolt of the lock when the door is closed. Measure and mark the position of the strike plate on the door frame, making sure it aligns with the bolt of the lock. Drill holes for the screws in the door frame, and then attach the strike plate using the provided screws.
Step 7: Test the Lock
After installing the lock body and the strike plate, test the lock to ensure it is working correctly. Insert the key into the lock and turn it to engage and disengage the bolt. Check that the bolt slides smoothly into and out of the strike plate. If the lock is not working properly, double-check the alignment of the lock body and the strike plate, and make any necessary adjustments.
Step 8: Finishing Touches
Once the lock is installed and tested, clean up any wood shavings or debris from the door and the surrounding area. You can also apply a coat of paint or stain to the door to match the existing finish and protect the wood.
Additional Tips
- If you are installing a lock on a metal shed door, the process may be slightly different. You may need to use different tools, such as a metal drill bit, and follow the manufacturer's instructions for metal door installation.
- Consider using a high-quality lock that offers good security features. Our Self Locking Door Lock is a great option for added convenience and security. It automatically locks when the door is closed, providing an extra layer of protection for your shed.
- For wooden shed doors, our Wooden Door Lock is specifically designed to fit and enhance the aesthetic of wooden doors. It offers a traditional look combined with reliable security.
- If you prefer a round-shaped lock, our Round Door Lock is a stylish and functional choice. It can add a unique touch to your garden shed while keeping it secure.
Conclusion
Installing a mortise garden shed lock is a relatively straightforward process that can significantly improve the security of your shed. By following the steps outlined in this blog, you can ensure a proper installation and enjoy peace of mind knowing that your shed and its contents are well-protected. If you have any questions or need further assistance with your lock installation, or if you are interested in purchasing high-quality garden shed locks, please feel free to contact us. We are here to help you find the best locking solutions for your needs.
References
- General knowledge of lock installation and shed security.