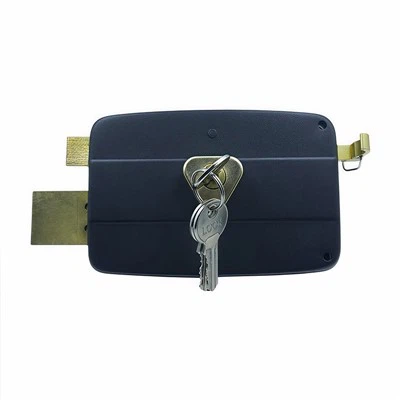
Installing a privacy latch on a door with a glass insert can be a practical and aesthetically pleasing addition to your living or working space. Privacy latches offer a way to secure a door without the need for a complex locking mechanism, and they are especially useful in areas where privacy is needed, such as bedrooms, bathrooms, or offices. In this blog post, as a reputable privacy latch supplier, I will guide you through the process of installing a privacy latch on a door with a glass insert, step by step.
Step 1: Gather the Necessary Tools and Materials
Before you begin the installation process, it is essential to gather all the tools and materials you will need. Here is a list of what you should have on hand:
- Privacy Latch Kit: Choose a privacy latch kit that is suitable for your door with a glass insert. Make sure it is made of high - quality materials and matches the style of your door.
- Screwdriver: A Phillips or flat - head screwdriver, depending on the type of screws included in your latch kit.
- Measuring Tape: To ensure accurate measurements during installation.
- Pencil: For marking the drilling points on the door.
- Safety Glasses and Gloves: To protect your eyes and hands during the installation process.
Step 2: Measure and Mark the Door
The next step is to measure and mark the door where the privacy latch will be installed. Start by determining the height at which you want to install the latch. A common height is around waist - level, but you can choose a height that is most convenient for you.
- Measure the Center: Use your measuring tape to find the center of the door. Mark this point with a pencil.
- Mark the Latch Location: Refer to the instructions provided with your privacy latch kit. Most kits will have a template that you can use to mark the exact location for the latch. Place the template on the door, aligning it with the center mark you made earlier, and mark the holes for the screws with a pencil.
Step 3: Prepare the Glass Insert
If your door has a glass insert, you need to be extra careful during the installation process to avoid damaging the glass.
- Protect the Glass: Use masking tape to cover the area around the marked holes on the glass. This will help prevent any scratches or chips during the drilling process.
- Choose the Right Drill Bit: Select a drill bit that is suitable for drilling through glass. A diamond - tipped or carbide - tipped drill bit is recommended for this task.
Step 4: Drill the Holes
Once you have marked the holes and prepared the glass insert, it's time to drill the holes for the privacy latch.
- Drill Slowly: When drilling through the glass, it is crucial to drill slowly and apply gentle pressure. Start with a small pilot hole and gradually increase the size of the hole to the appropriate diameter for the screws.
- Cool the Drill Bit: To prevent the drill bit from overheating and damaging the glass, periodically dip the drill bit in water or use a lubricant specifically designed for drilling glass.
- Drill Through the Door Frame: After drilling through the glass, drill the corresponding holes in the door frame. Make sure the holes in the door frame align with the holes in the glass insert.
Step 5: Install the Privacy Latch
Now that you have drilled the holes, it's time to install the privacy latch.


- Attach the Latch to the Door: Place the privacy latch over the holes in the glass insert and the door frame. Insert the screws through the holes in the latch and into the holes in the door and frame. Use your screwdriver to tighten the screws, but be careful not to overtighten them, as this could crack the glass.
- Test the Latch: Once the latch is installed, test it to make sure it operates smoothly. Open and close the door several times to ensure that the latch engages and disengages properly.
Step 6: Finishing Touches
After installing the privacy latch, there are a few finishing touches you can do to make the installation look more professional.
- Remove the Masking Tape: Carefully remove the masking tape from the glass insert to reveal a clean, scratch - free surface.
- Clean the Door: Wipe down the door and the latch with a clean, damp cloth to remove any dust or debris from the installation process.
Other Lock Options
In addition to privacy latches, we also offer a variety of other door locks. If you are interested in different types of locks, you can check out our Push Lock, Outdoor Lock, and Universal Door Lock. These locks are designed to meet different needs and preferences, whether you are looking for a lock for your front door, outdoor gate, or any other type of door.
Contact Us for Purchasing
If you are in the market for a privacy latch or any other type of door lock, we are here to help. As a leading privacy latch supplier, we offer high - quality products at competitive prices. Our team of experts can provide you with professional advice and guidance to ensure that you choose the right lock for your needs. Whether you are a homeowner, a contractor, or a business owner, we are committed to providing you with the best products and services. Please feel free to contact us to discuss your requirements and start the purchasing process.
References
- "Door Hardware Installation Guide," published by a leading door hardware manufacturer.
- "DIY Home Improvement: Installing Door Locks," an online resource for home improvement projects.