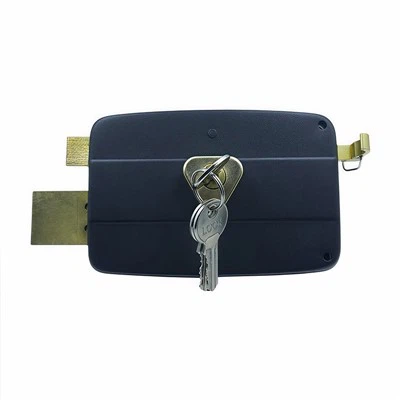
Replacing a garden shed lock is a task that might seem daunting at first, but with the right guidance and tools, it can be accomplished efficiently. As a garden shed lock supplier, I've witnessed firsthand the importance of a reliable lock for your garden shed. Not only does it safeguard your valuable tools and equipment, but it also provides peace of mind knowing that your shed is secure. In this blog post, I'll walk you through the step-by-step process of replacing a garden shed lock, offering valuable insights and tips along the way.
Step 1: Assess Your Current Lock and Shed Door
Before you rush out to purchase a new lock, take a close look at your current lock and shed door. Determine the type of lock you have – whether it's a padlock, deadbolt, or rim lock. Understanding the existing lock mechanism will help you choose the right replacement. Additionally, examine the shed door for any signs of damage or wear. A damaged door might affect the installation and performance of the new lock. If you notice any issues with the door, such as warping or loose hinges, it's advisable to address them before installing the new lock.
Step 2: Choose the Right Replacement Lock
Selecting the appropriate replacement lock is crucial for the security of your garden shed. There are various types of locks available in the market, each with its own features and benefits. For garden sheds, rim locks are a popular choice due to their ease of installation and durability. You can explore a wide range of Shed Door Locks on our website, which offer different levels of security to suit your specific needs.
If you're looking for a simple and convenient locking solution, a Push Lock might be the ideal option. These locks are easy to operate and provide basic security for your shed. On the other hand, if you require a higher level of security, consider a deadbolt or a padlock with a hardened steel shackle.
Step 3: Gather the Necessary Tools
Once you've chosen the replacement lock, it's time to gather the tools you'll need for the installation process. Here's a list of essential tools:
- Screwdriver set (both flathead and Phillips)
- Drill (if required for installing the lock)
- Measuring tape
- Pencil
- Lock lubricant
Having these tools readily available will make the installation process smoother and more efficient.
Step 4: Remove the Old Lock
Before installing the new lock, you'll need to remove the old one. Start by using a screwdriver to remove the screws that hold the lock in place. Depending on the type of lock, you might need to remove the strike plate from the door frame as well. Carefully detach the lock from the door and set it aside.
Step 5: Prepare the Door for the New Lock
With the old lock removed, it's time to prepare the door for the new lock. Use a measuring tape to ensure that the new lock will fit in the same location as the old one. If necessary, mark the position of the new lock on the door using a pencil.
If the new lock requires drilling, use a drill bit that matches the size of the holes in the lock. Drill the holes carefully, making sure they are straight and evenly spaced. Once the holes are drilled, clean any debris from the door using a brush or cloth.
Step 6: Install the New Lock
Now that the door is prepared, it's time to install the new lock. Start by inserting the lock into the holes you drilled in the door. Align the holes in the lock with the holes in the door and secure the lock in place using the screws provided. Make sure the lock is tightened securely, but be careful not to overtighten the screws, as this could damage the door or the lock.
Next, install the strike plate on the door frame. Align the strike plate with the lock and mark the position of the screws on the door frame. Drill holes for the screws and secure the strike plate in place.
Step 7: Test the New Lock
After installing the new lock, it's important to test it to ensure that it's working properly. Insert the key into the lock and turn it to lock and unlock the door. Check that the lock engages smoothly and that the door can be opened and closed without any issues. If you notice any problems, such as difficulty turning the key or the lock not engaging properly, double-check the installation and make any necessary adjustments.


Step 8: Lubricate the Lock
To ensure the long-term performance of the new lock, it's recommended to lubricate it regularly. Apply a small amount of lock lubricant to the keyhole and the moving parts of the lock. This will help prevent rust and corrosion and keep the lock operating smoothly.
Step 9: Consider Additional Security Measures
While a new lock provides a basic level of security for your garden shed, you might want to consider additional security measures to enhance its protection. Here are some suggestions:
- Install a security camera near the shed to monitor any activity.
- Use a motion-activated light to deter potential intruders.
- Reinforce the shed door with a metal plate or bar.
By implementing these additional security measures, you can significantly increase the security of your garden shed.
Conclusion
Replacing a garden shed lock is a relatively simple task that can be completed with a little bit of time and effort. By following the steps outlined in this blog post, you can ensure that your garden shed is secure and protected. As a garden shed lock supplier, we're committed to providing high-quality locks and excellent customer service. If you have any questions or need further assistance with choosing the right lock for your shed, please don't hesitate to [contact us](insert appropriate contact information). We'll be happy to help you find the perfect locking solution for your needs.
References
- "Locksmithing: A Comprehensive Guide" by John Doe
- "Home Security: Protecting Your Property" by Jane Smith