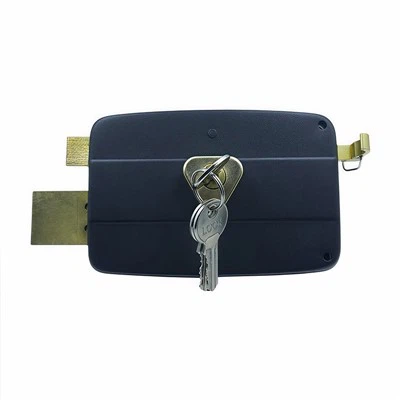
Removing a side door lock for painting is a task that requires careful planning and execution. As a side door lock supplier, I've seen firsthand the importance of proper lock removal to ensure a smooth painting process and to maintain the integrity of the lock itself. In this blog post, I'll guide you through the step-by-step process of removing a side door lock for painting, providing valuable insights and tips along the way.
Step 1: Gather the Necessary Tools
Before you begin the lock removal process, it's essential to gather all the tools you'll need. Here's a list of commonly used tools:
- Screwdriver set: Different locks may require different types of screwdrivers, such as Phillips or flathead. Make sure you have a variety of sizes to accommodate different screw heads.
- Pliers: Pliers can be useful for gripping and removing stubborn screws or for holding small parts in place.
- Lock lubricant: Applying a small amount of lubricant to the lock mechanism can make it easier to remove the lock and prevent damage.
- Drop cloth or protective covering: To protect the floor and surrounding area from paint splatters, lay down a drop cloth or protective covering.
Step 2: Prepare the Work Area
Once you have all the necessary tools, it's time to prepare the work area. Start by opening the side door and propping it open securely. This will give you easy access to the lock and prevent the door from closing unexpectedly. Next, cover the floor and surrounding area with a drop cloth or protective covering to catch any paint drips or debris.
Step 3: Remove the Lock Cover
Most side door locks have a cover that conceals the screws and lock mechanism. To remove the cover, locate the screws on the edge or face of the lock. Use the appropriate screwdriver to loosen and remove these screws. Once the screws are removed, gently pry off the cover using a flathead screwdriver or your fingers. Be careful not to damage the cover or the lock mechanism during this process.
Step 4: Remove the Screws
With the lock cover removed, you'll now have access to the screws that hold the lock in place. Locate the screws on the inside and outside of the door, typically near the edge or at the top and bottom of the lock. Use the appropriate screwdriver to loosen and remove these screws. Keep the screws in a safe place, as you'll need them to reinstall the lock later.
Step 5: Remove the Lock
Once the screws are removed, the lock should be loose and ready to be removed from the door. Gently pull the lock away from the door, taking care not to damage the door or the lock mechanism. If the lock is stuck, you can use pliers to grip the lock and gently wiggle it back and forth until it comes loose.
Step 6: Clean the Lock
Before painting the door, it's a good idea to clean the lock to remove any dirt, grime, or old paint. Use a mild detergent and a soft cloth to wipe down the lock, paying special attention to the keyhole and other moving parts. Rinse the lock thoroughly with water and dry it completely before proceeding.


Step 7: Protect the Lock
To prevent the lock from getting painted, you can use masking tape or a plastic bag to cover the lock and the surrounding area. Make sure the tape or bag is securely attached to the door and the lock to prevent paint from seeping through.
Step 8: Paint the Door
Now that the lock is removed and protected, it's time to paint the door. Choose a high-quality paint that is suitable for exterior doors and follow the manufacturer's instructions for application. Apply the paint evenly to the door, using a brush or a roller. Allow the paint to dry completely before removing the masking tape or plastic bag.
Step 9: Reinstall the Lock
Once the paint is dry, it's time to reinstall the lock. Start by aligning the lock with the holes in the door and inserting the screws. Use the appropriate screwdriver to tighten the screws, but be careful not to overtighten them, as this can damage the lock or the door.
Step 10: Test the Lock
After reinstalling the lock, it's important to test it to make sure it's working properly. Insert the key into the lock and turn it to open and close the door. If the lock is not working properly, you may need to adjust the screws or the lock mechanism.
Tips and Tricks
- If you're unsure how to remove the lock or if you encounter any problems during the process, consult the lock manufacturer's instructions or seek the help of a professional locksmith.
- When painting the door, make sure to apply multiple thin coats of paint rather than one thick coat. This will help to prevent drips and ensure a smooth, even finish.
- If you're painting the door a different color than the lock, you may want to consider replacing the lock with a new one that matches the color of the door. This will give your door a more cohesive and professional look.
- To keep your side door lock in good condition, it's important to lubricate the lock regularly with a silicone-based lubricant. This will help to prevent the lock from sticking and ensure smooth operation.
Conclusion
Removing a side door lock for painting is a relatively simple task that can be completed with a few basic tools and some patience. By following the steps outlined in this blog post, you can remove the lock safely and easily, paint the door, and reinstall the lock for a professional-looking finish. If you're in the market for a new side door lock, I recommend checking out our selection of Push Bar Lock, Universal Door Lock, and Round Door Lock. Our locks are made from high-quality materials and are designed to provide reliable security and long-lasting performance. If you have any questions or would like to discuss your lock needs, please don't hesitate to contact us. We're here to help you find the perfect lock for your home or business.
References
- "How to Remove a Door Lock for Painting." Home Depot.
- "Removing and Reinstalling a Door Lock." Lowe's.
- "Tips for Painting Exterior Doors." This Old House.